
Jagdtigers in the West – Steel Panthers AAR Part 2
Click here to read Part 1 of this Steel Panthers AAR.
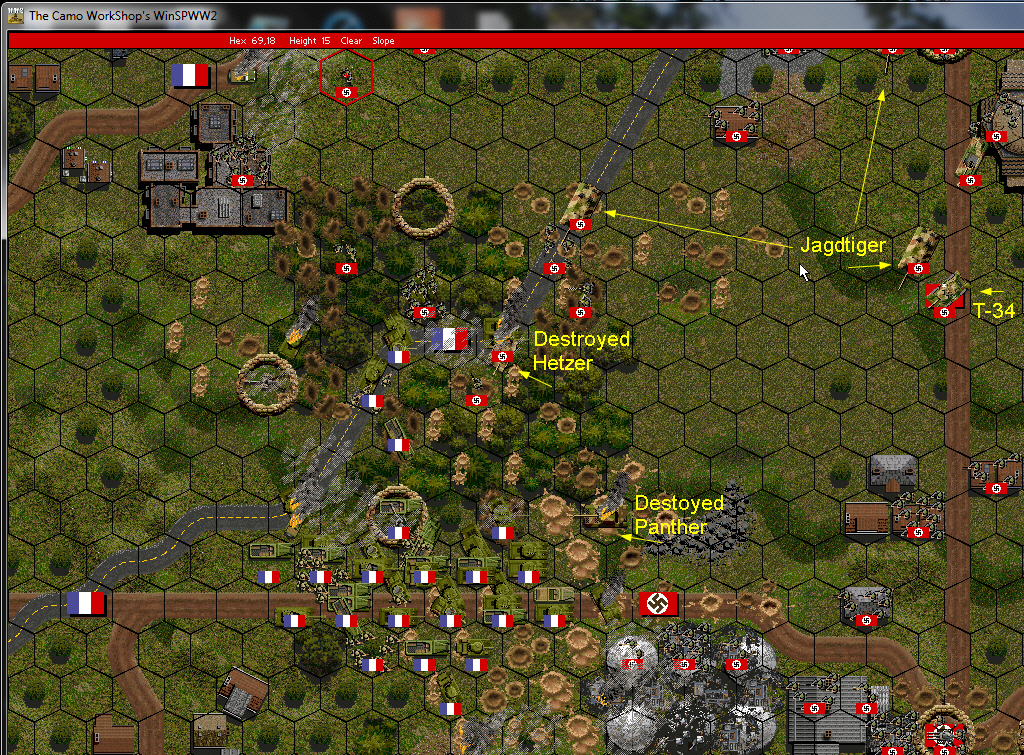
Turn 11
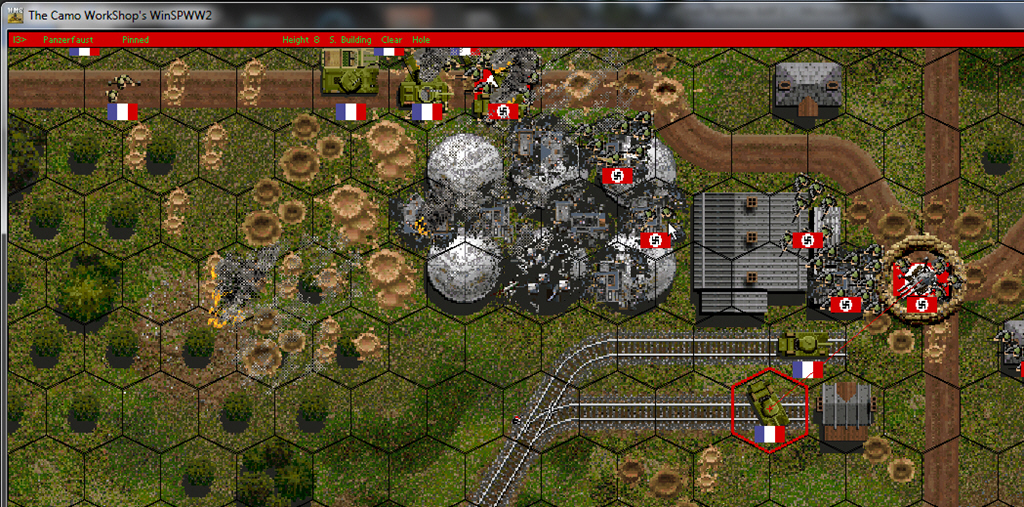
On Turn 11 I try to bring some pressure to the eastern victory location. I’d love to recap it. There is probably too much French armor to be effective, but I bring a sniper down to drive off the broken French infantry squad that had been occupying it. I also bring down my T-34 and move up my Jagdtiger just a bit to get some better shots at any units attempting to take the next victory hex to the West.
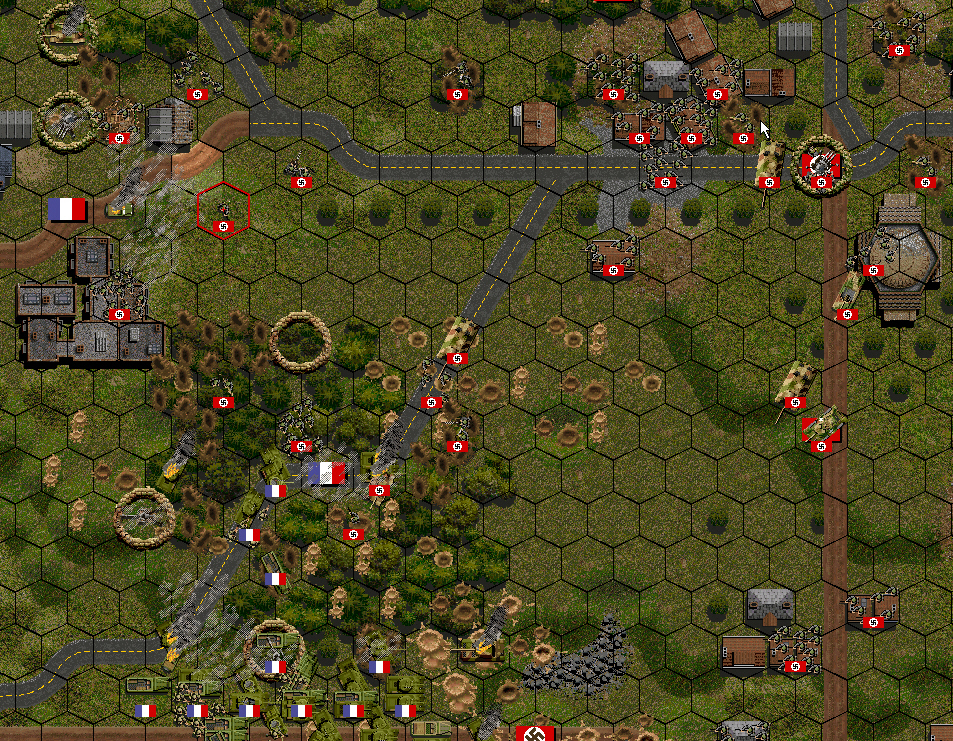
The French Turn 11 was ugly. Two airstrikes came in and one hit my lead Panzerfaust unit protecting the victory location in the middle of the map. The French captured it, but my Jagdtigers destroyed the tank. The trick now is to get an unsuppressed unit to retake it at the end of the game. Given all the armor lined up behind there the odds are not good unless I can take out a bunch of them now. The fight along the road to the east is also heating up. I don’t have much to hold it with and while I did manage to destroy a vehicle, the French hold tightened.
Turn 12
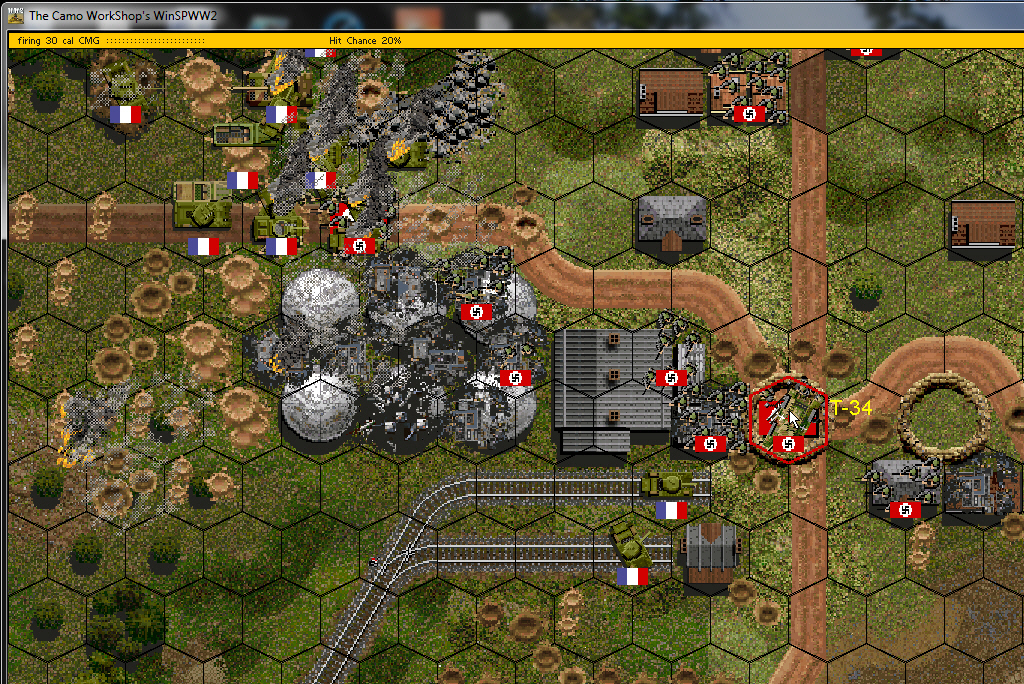
I bring the full force of the Jagdtigers to bear and take out two Shermans. The good news is that so late in the game my low ammo supplies probably aren’t going to matter much. My Pz T-34 bounces some rounds off the hull of another Sherman, and I hope that’s enough to rattle the crew and drive them back. I roll up my SdKfz 234 and bring its gun on a 105 mm Sherman. Three shots later it’s on fire. That’s a relief.
One of the things I find interesting about Steel Panthers is how so much equipment can be cross-utilized. For instance I have several quad 20mm anti-aircraft guns called Vierlings. These Vierlings have been getting a good workout against the fighters and bombers that have been harassing me. But now that the French have come into view I turn a Vierling on a half-track that was immobilized by my Jagdtiger. Two bursts of flak later and it’s in flames. Trying to envision this engagement actually happening it kind of blows my mind.
I bring some infantry south as it looks like the French won’t be pushing anywhere near them. Maybe there’s enough time to retake one of these victory hexes. I end the turn.
Turn 12 for the French is a bad one. I lost count, but I believe I took out five or six of their tanks as they broke through the smoke of burning lead vehicles or the shelter of the forest. If the AI had held its ground it could have held those two victory hexes without a problem. But now, they’ve lost a significant part of their armor and don’t have much less to prevent me from pushing up.
Two M5 light tanks are attempting to take an objective in the south. That is an interesting development. My tanks’ guns have the range, but will they be able to take the objective in spite of that?
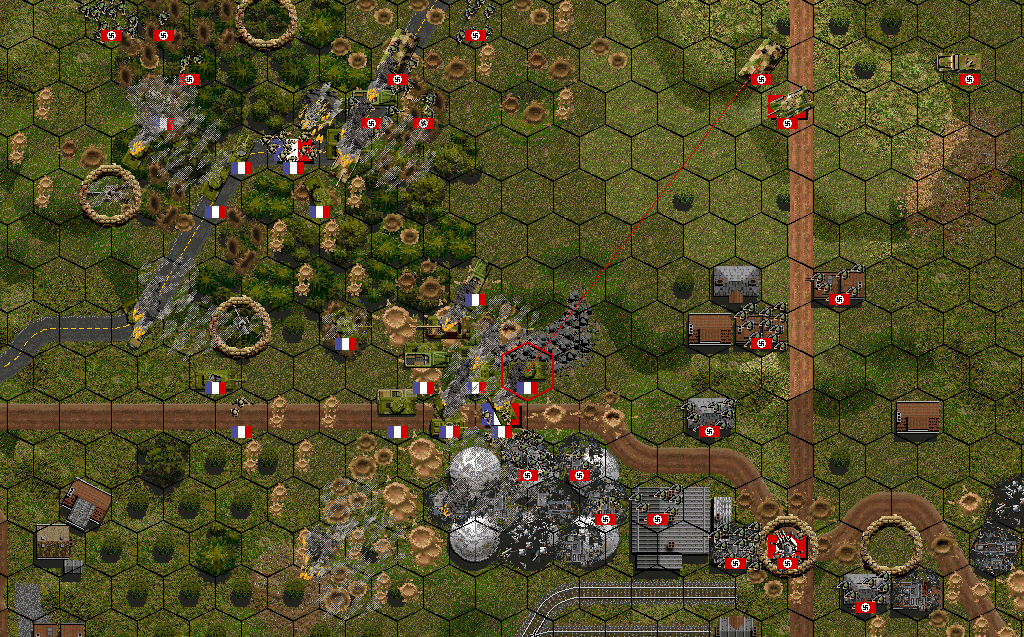
Turn 13
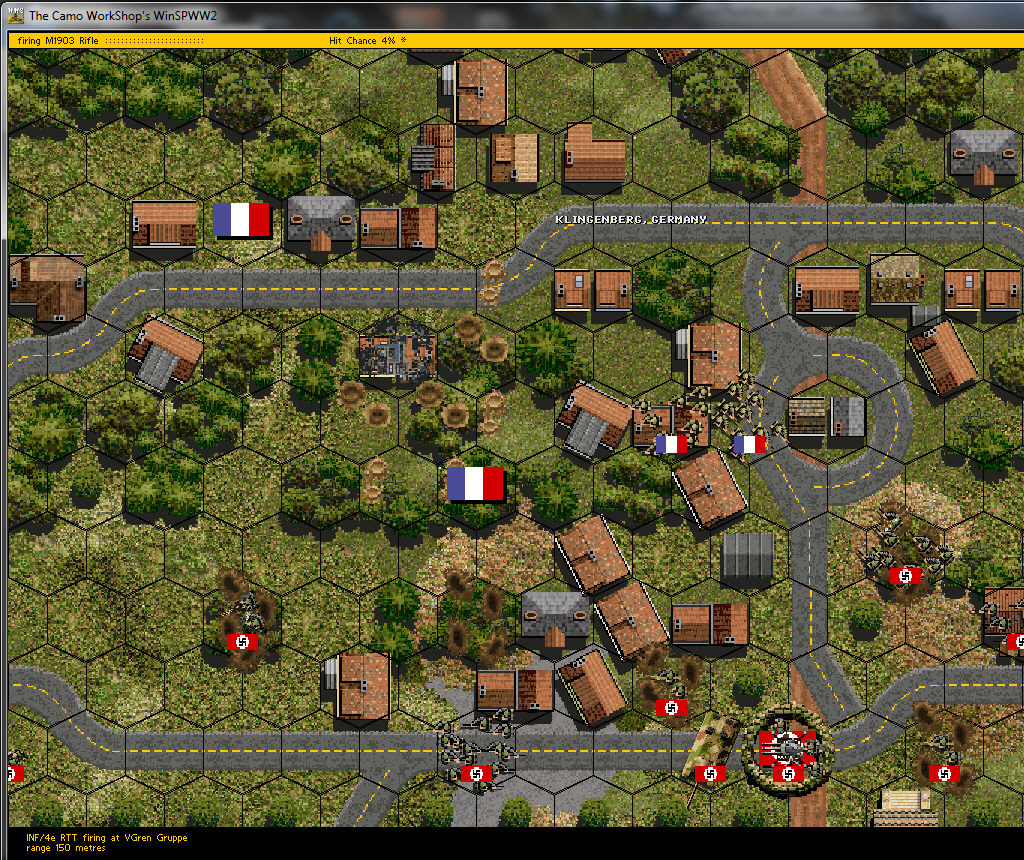
My Jagdtiger takes out another Sherman and a half-track. I then turn my attention to the mess unfolding around that southern middle objective. My infantry drives off the French infantry and I advance them to take the objective. Surprisingly the do so right under the nose of a French scout car, a M8 RRLLE. It’s buttoned up, which might explain why. Deciding to push my luck, I order the infantry to attack it. I have a Panzerfaust crew and more infantry to retake that hex if required. Might as well go out swinging because the infantry in the road has no more movement to get back into cover. They might as well shoot it out how hope for a lucky assault on the vehicle.

No dice. They get shot at, take a casualty, and the suppression rises to 18. I pull up more infantry to support them. Unfortunately the closest infantry is pinned. But I bring up some squads in better shape and hope next turn goes well.
Then I turn my attention the M8s in the southwest. Those could be a real problem and I don’t have much AT support to address them. It looks like there’s enough smoke to cover the T-34 for it to rush further south down the road and give that light armor some cause for concern. I also ponder using the Vierling on it. It’s doubtful that it will have any effect, but it might rattle the crew. If I don’t use them, they’re simply going to get shot up. So I give it a whirl. They miss and the M8 takes them under fire, suppressing them to a 22 which prevents the crew from firing any more. Time to bring down the T-34.
The T-34 races into the same hex as the Vierling and draws the M8’s fire, but to no effect. Because it moved so far it has very little chance of getting an accurate shot this turn. But I know that hex won’t get overrun by light armor so I elect to hold my fire until the next turn, or at least let the friend AI do the aiming. I end the turn.
The French Turn 23 went well for them. A P-47 and a P-51 shot at my Jagdtiger, fortunately doing no damage. A French infantry platoon took an objective in the north that I didn’t properly defend, and the crazy French commander blitzed the southern victory objective and retook it. In addition those M8s are giving my T-34 a big headache. This is probably my last turn. We’ll see what I can do with it.
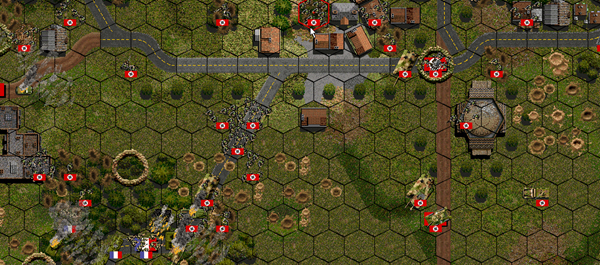
Turn 14
I take the French HQ unit under fire and destroy its vehicle. I then somehow inadvertently move my T-34 out of position. It causes no harm, but I lose action points bringing it back to position and can’t fire as many rounds. I shoot up the French HQ squad and then take a gamble and move a Jagdtiger down the road. Maybe this scenario will have variable turn lengths and I’ll get a couple extra turns to drive off some of the French forces holding these victory hexes. Then I end the turn.
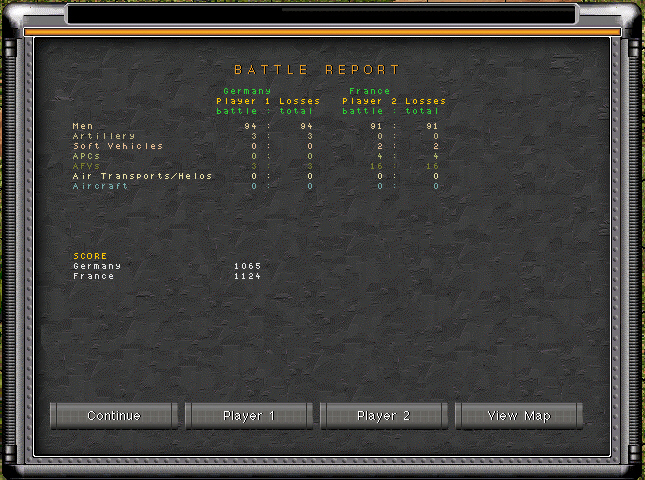
No such luck. It’s the end of the game. I lose to the French on points, though it’s close. The game will call this a draw. I have destroyed 16 French AFVs while losing only three. Historically, that’s about right. But the Allies could afford those losses, appalling though they were. I was unable to significantly alter the course of victory…this time.
What I did manage to do successfully is to keep my Jagdtigers all functional. The loss of a Hetzer is bad, but less important than those huge tank destroyers. My Volks Grenadiers didn’t flee the map, but once they were suppressed their leaders rarely were able to rally them and those that saw action mostly were pinned in place and of little use. Given the quality of troops and limited supplies, I’m not unhappy fighting to a draw. But strategically Germany was going down fast. VE Day is about a month away, and this scenario is a microcosm that explains why.
Great AAR, thanks. I lost count of the amount of hours I spent playing the SP series, although not for some years now. May have to revisit…
Great aar, interesting guide, thanks 🙂
one of the best games ever made, I played thousands of hours on this game.
Hey I see the dates are 2011 wished I would’ve known about this site. You did a Great narrative on that scenario, really good! I love my Steel Panthers and WW2 is my most favorite era and game